
Relatively new to the Olympus brand, I have been increasingly impressed with its offerings. Five Olympus SLRs have landed in my lap in the last couple of years, and all of them work beautifully. All of the Olympus point-and-shoot cameras I have work equally well. The only problems I have had were from the Pen and Trip lines of Olympus compact cameras.
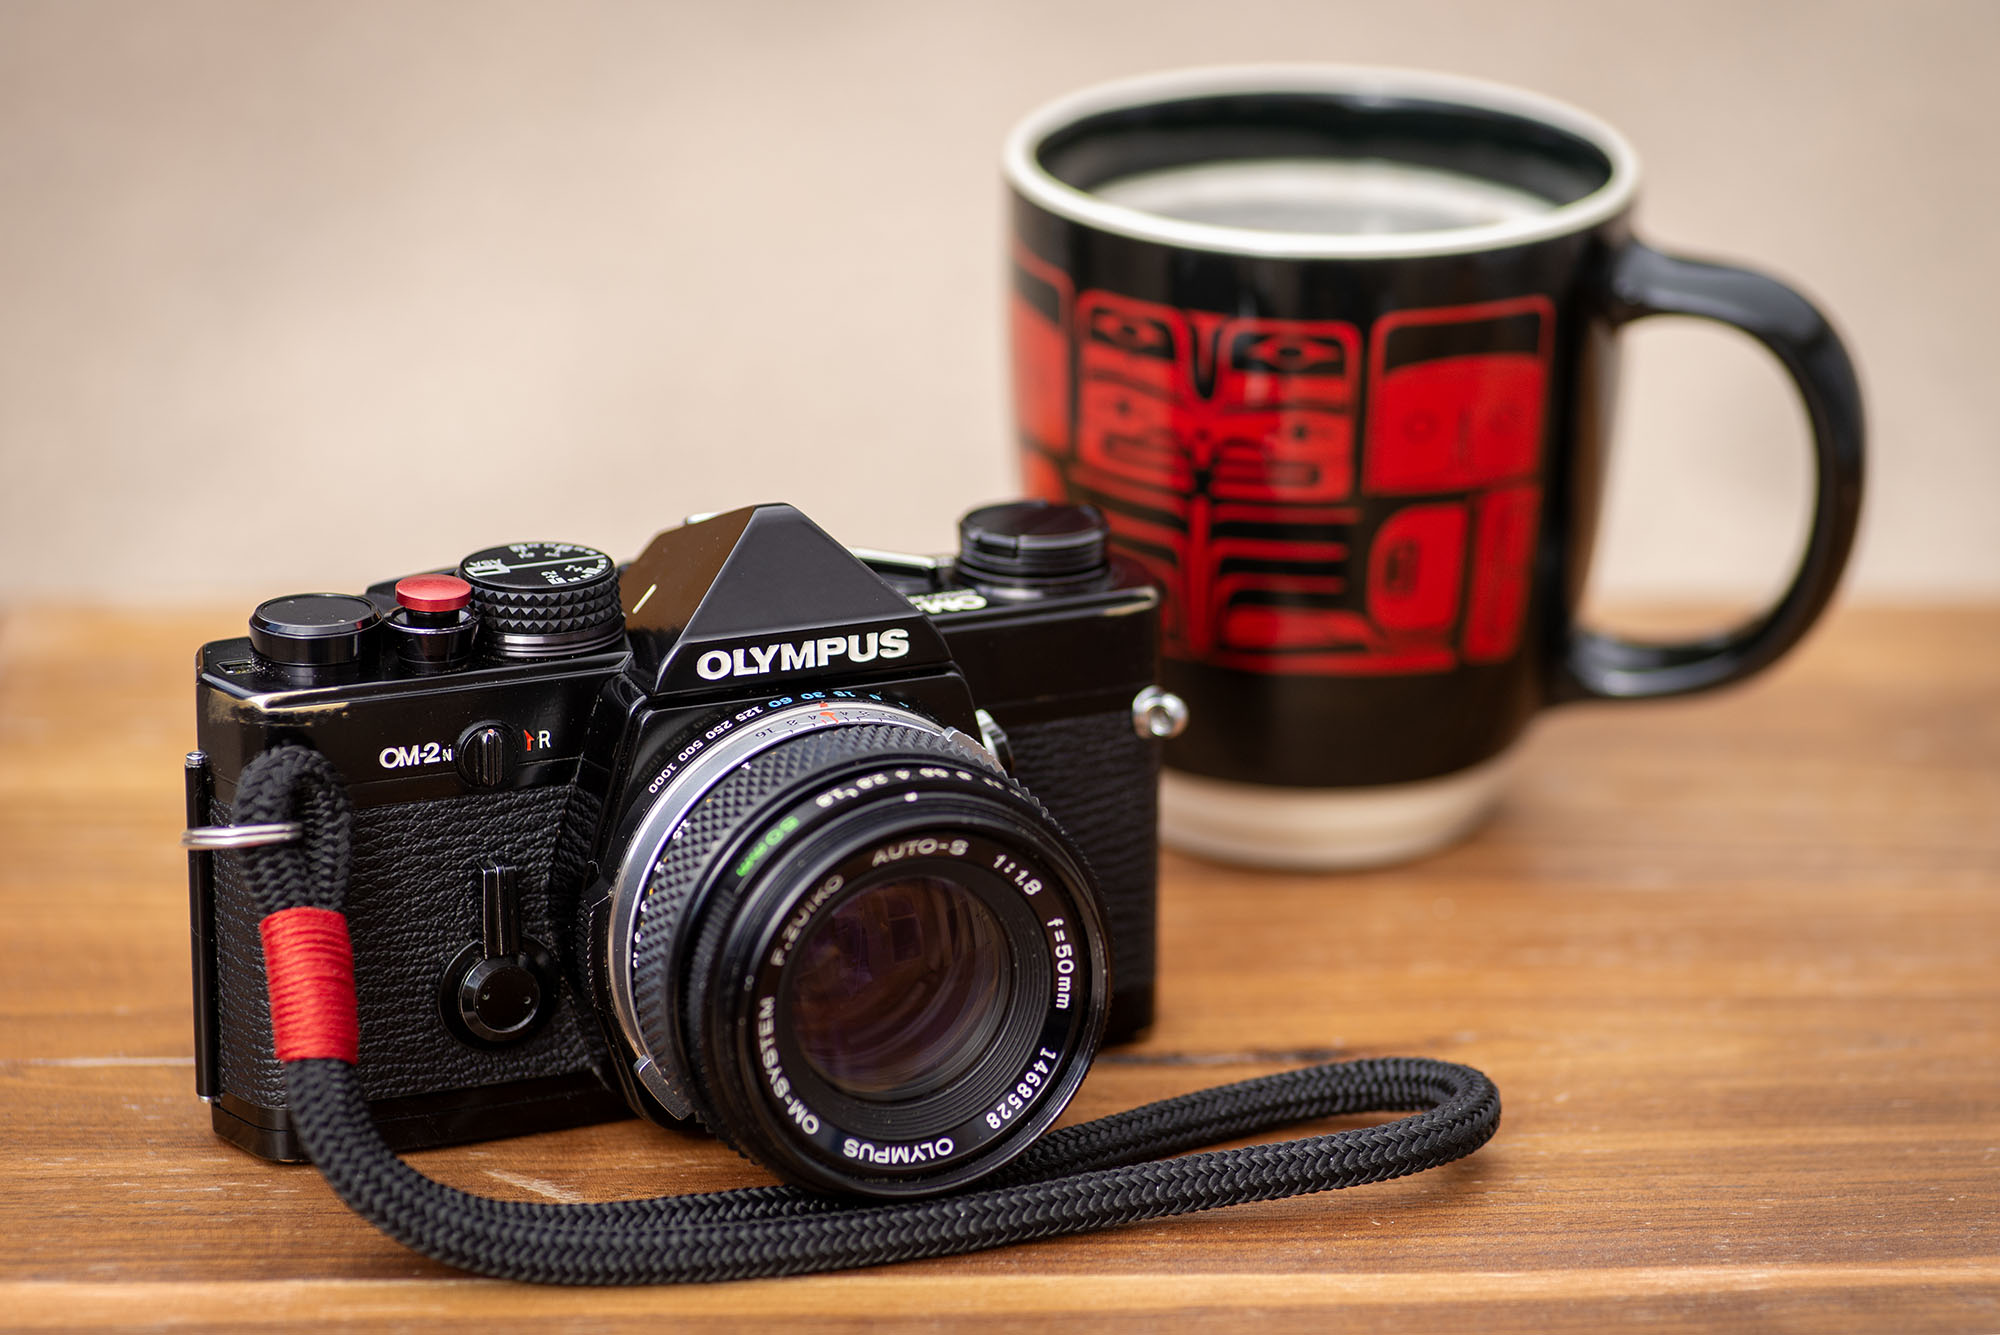
This OM-2n showed up in a mixed bag of gear, dirty and neglected. The batteries were dead, and the mirror was locked in the up position. New batteries, light seals and a good cleaning brought it back to life. A little brassing around the strap lugs told me it was well-loved.

The first thing that strikes me when picking up an Olympus SLR is its diminutive size. It just feels tiny in comparison to the many SLRs I have handled over the years, probably because it is.
Yoshihisa Maitani, the designer behind the OM dynasty, set out to build a camera 20 percent smaller and 50 percent lighter than the competing Nikon. Moreover, he demanded zero compromises in features and durability.
Maitani had set strict size constraints, and valiantly fought off the engineers’ requests for more latitude. The final result exceeded those constraints by only one millimeter. This became the OM-1.

Subsequent SLRs added features and modernized electronics, but stayed true to Maitani’s philosophy. The OM-2 was introduced in 1974, and the OM-2n in 1979.
The second thing that strikes me is the gloriously large viewfinder. It almost seems impossible to have that large of a view through such a small camera. This viewfinder gives the photographer a 97 percent coverage with a magnification factor of 0.92 (with 50mm lens focused at infinity).
Henri Cartier-Bresson said that his camera was an extension of his eye, and this generous and uncluttered viewfinder facilitates that relationship. This camera almost disappears when raising it to one’s eye.
In the center of that viewfinder there is a split-image focus indicator surrounded by a microprism ring. When switched to the “Manual” mode, a transparent over-under needle exposure indicator slides into view on the left. Changing the aperture or the shutter speed will move the needle.

Sometimes the lighting in a scene requires an intentional departure from the meter reading. The instruction manual has an explanation of the exposure relative to the position of the needle (above). This can be used as a visual reference for more precise adjustments to the exposure.
In the “Auto” mode, a shutter speed scale appears, with a needle that indicates the shutter speed chosen by the meter. This is an aperture-priority mode. Automatic mode shutter speeds top out at 1/1000, but go down to 120 seconds.

A third position of the selector switch is simply labeled, “Off”. That would lead one to believe that it is indeed, “off”. That’s not entirely accurate. Remarkably, if you press the shutter button to take a photo, the automatic mode turns on momentarily and gives you a properly exposed photo, provided that the shutter speed is 1/30 or faster.
The fourth position of the switch is labeled “Check-Reset”. This accomplishes a couple of functions. First, it is a battery check that lights up a red LED on the back if the batteries are good. It flashes if they are weak, and won’t light at all if they are depleted. Second, it resets the mirror if the camera locks it in the up position.

The mirror will be locked up in two situations: first, if the shutter button is depressed when the batteries are depleted, and second, if the film is advanced during a long exposure. The manual states that the mirror locking up is a safety feature and not a mechanical fault. Moving the switch to the “Check-Reset” will reset the mirror and allow normal function with good batteries.
On the top right of the camera there is a dial with two functions. First, the film speed is set here by pulling up on the dial and turning it to the correct ASA (ISO). Turning without lifting allows exposure compensation, or controlled under- or overexposure. Each click is ⅓ stop in the direction desired. When any compensation is applied, a small +/- indicator slides into the bottom left of the viewfinder.
While many SLRs have an integral hot shoe, the OM-2n has a removable hot shoe. There is a threaded socket on the top of the pentaprism with two holes for the contact pins. Printed in white are the tiny letters, “SHOE 4” above the viewfinder. Different hot shoes were made for different models, and #4 is the proper one to use on the OM-2n.
To the left of the lens mount there is also a PC socket for triggering flash. The collar around the socket is a switch labeled “X” and “FP”. This should be set to “X” for any electronic flash, unless you are using specifically the “FP” flash unit. Dedicated Olympus electronic flash units will set the “X” sync automatically.
One will notice upon peeking behind the mirror (with the shutter cocked) that there is a random black and white pattern of square dots on the shutter curtain. This is part of the “OTF” meter system, meaning “Off The Film”. Metering off the film plane ensures accurate exposures without interference from stray light entering the viewfinder.

This system allows automatic shutter speeds from 1/1000 down to 120 seconds to provide accurate exposure even if there are changes in lighting that occur during exposure. It also controls flash duration by metering the light hitting the film itself. I have come to trust the meter, as it seems to read the scene very well.
My “user experience” is similar to other OM-system cameras, and has been very enjoyable. Its small form factor allows for small bags and is easy on the neck and shoulder. Vibration from mirror slap is very well controlled. Handling the camera inspires confidence in a well-built instrument. Fit and finish are excellent.
Placement of the controls may be awkward for some. The aperture ring is toward the front of many Zuiko lenses, rather that the rear. The shutter speed dial is a rotating ring around the lens mount. After getting accustomed to it, I realized that it allowed me to very quickly change from adjusting the aperture to changing the shutter speed.

All of the Zuiko optics in my cabinet right now seem well built and optically sound. I think there are six copies of the 50mm f1.8; one is an irreparably damaged parts donor. The rest perform beautifully. The Zuiko zoom lenses that I currently have are consumer-grade, but do their job quite well considering their age and price point.
After thinking long and hard about any shortcomings or missing features, all I could really come up with was the lack of complete exposure information in the viewfinder. Perhaps that simply wasn’t an option for the engineers to include when complying with Maitani’s size constraints.

With the hot shoe removed and the addition of a soft release and a simple wrist strap, this is a wonderful walkabout camera. It will drop into any convenient bag and is always ready for action, even when “off”.
Maitani was successful shrinking the 35mm SLR, and he did so without sacrificing the aesthetic appeal. I find the camera petite and beautiful while being packed with useful features and technical excellence. This camera makes me smile.

Specs:
Introduced: 1979
Weight: 519g (18.3oz)
Shutter: Horizontal rubberized cloth focal plane shutter, electronically controlled
Shutter Speed Range: 1-1/1000 second plus bulb
Flash Sync: 1/60 second
ASA Range: 12-1250
Meter: Film plane metering, Over/under needle in manual, shutter speed indicator in Auto.
Hot Shoe: Optional and detachable, Shoe #4
PC Socket: Yes
Battery: 2 x A76 or equivalent
Self-timer: Yes
Auto-exposure Lock: No
DOF Preview: On Zuiko lens barrel
Mirror Lockup: No