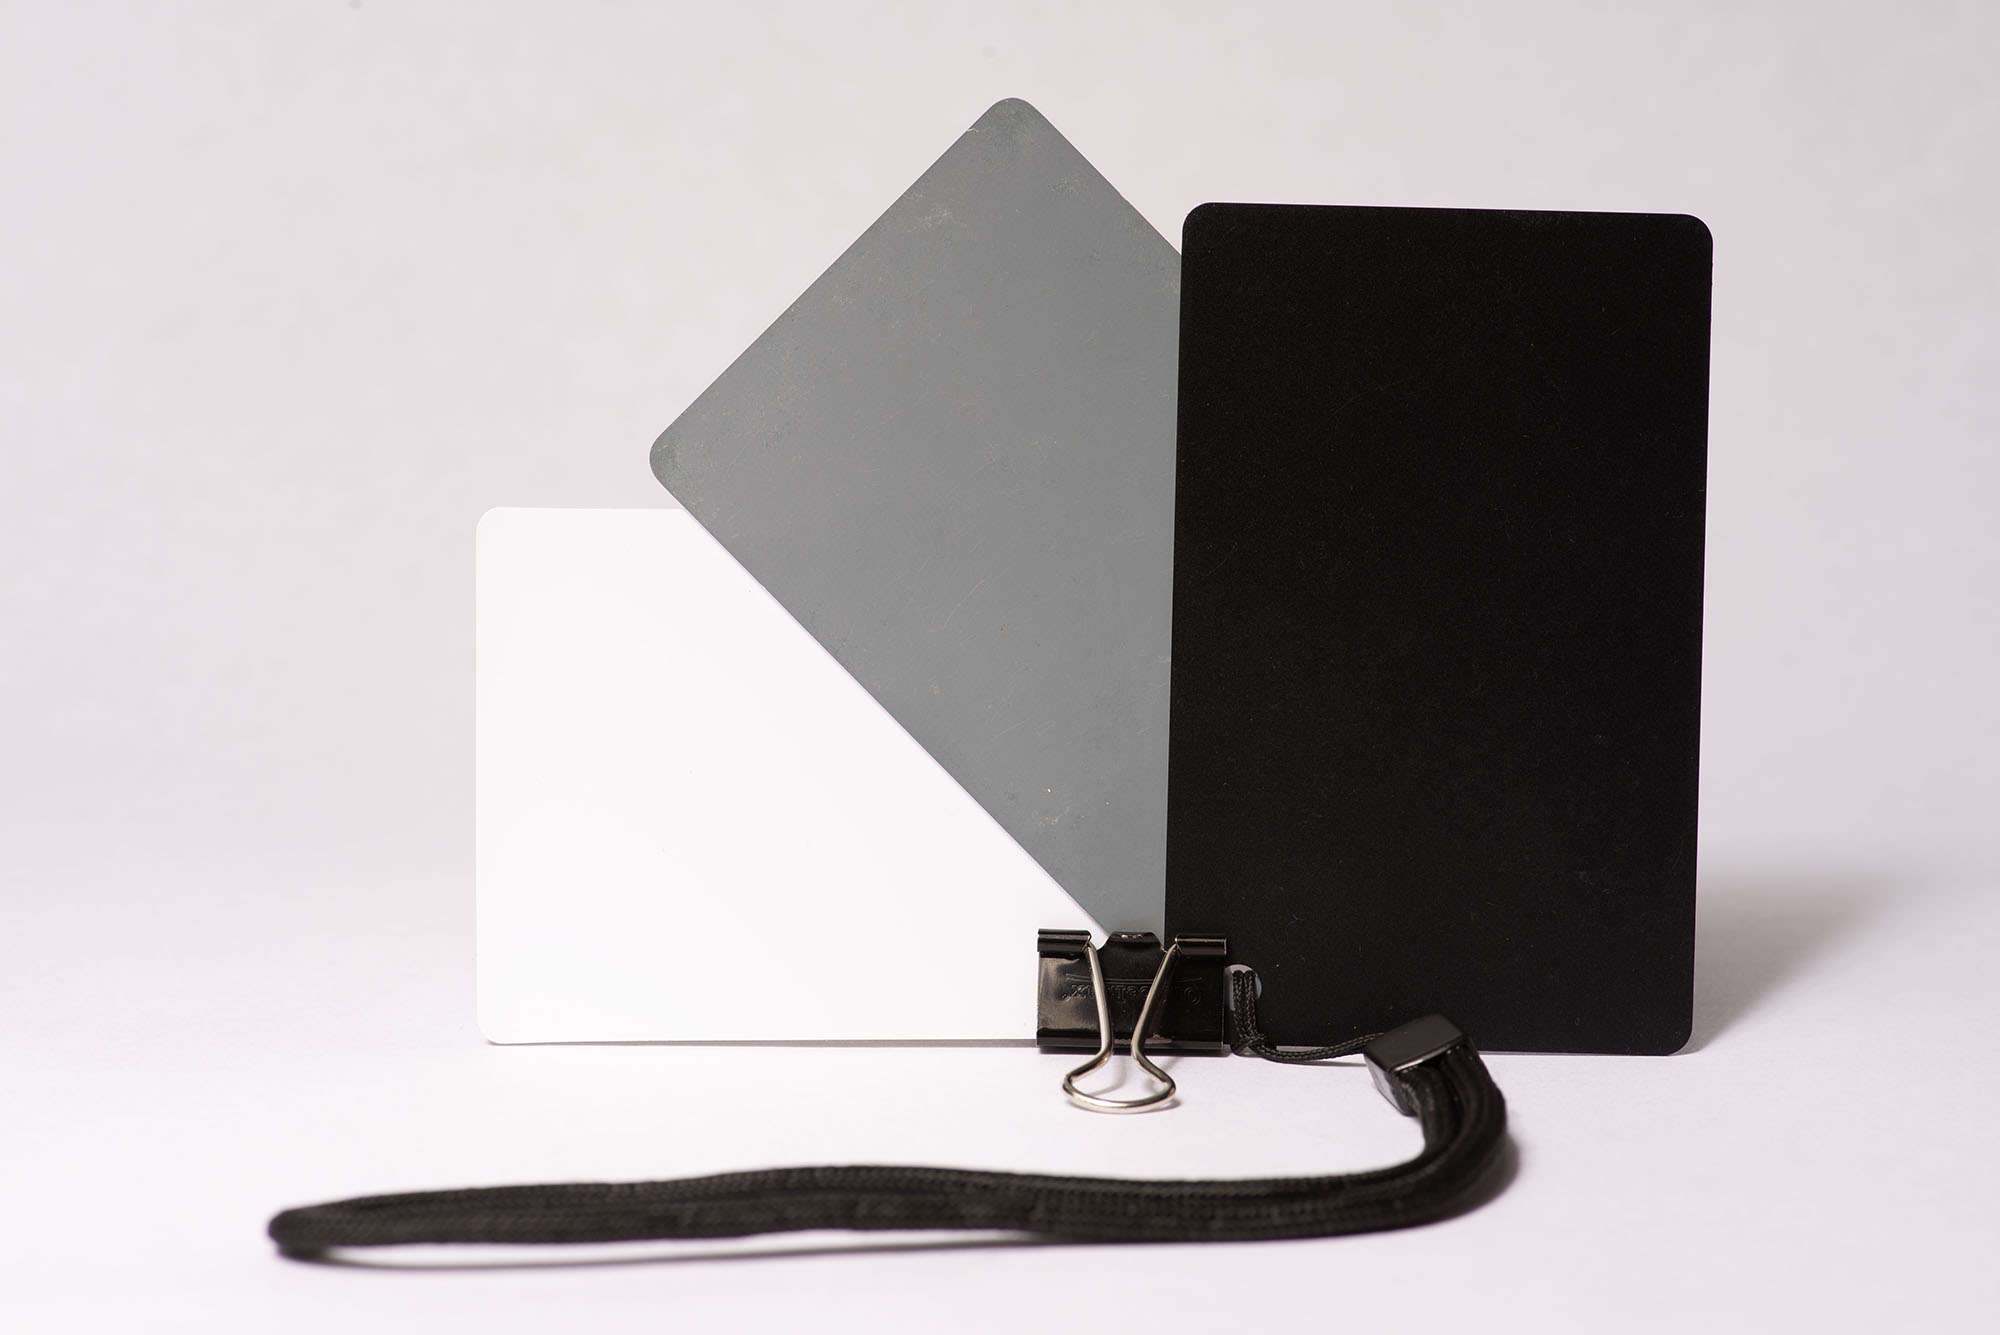
I thought I’d write a little about a tool I occasionally use. Often sold as a set of three cards, gray, white and black, these have multiple uses. Without going into the history and theory of the 18% gray value as it pertained to early half-tone printing, the zone system, and Kodak’s early metering systems, I simply want to describe how I use them today.
Every photographic forum seems to have a discussion about 18% gray and it’s importance in metering. Those discussions usually end up in disagreements about proper methods and actual values. I don’t intend to go there. These cards are useful to me in the following ways:
White Balance
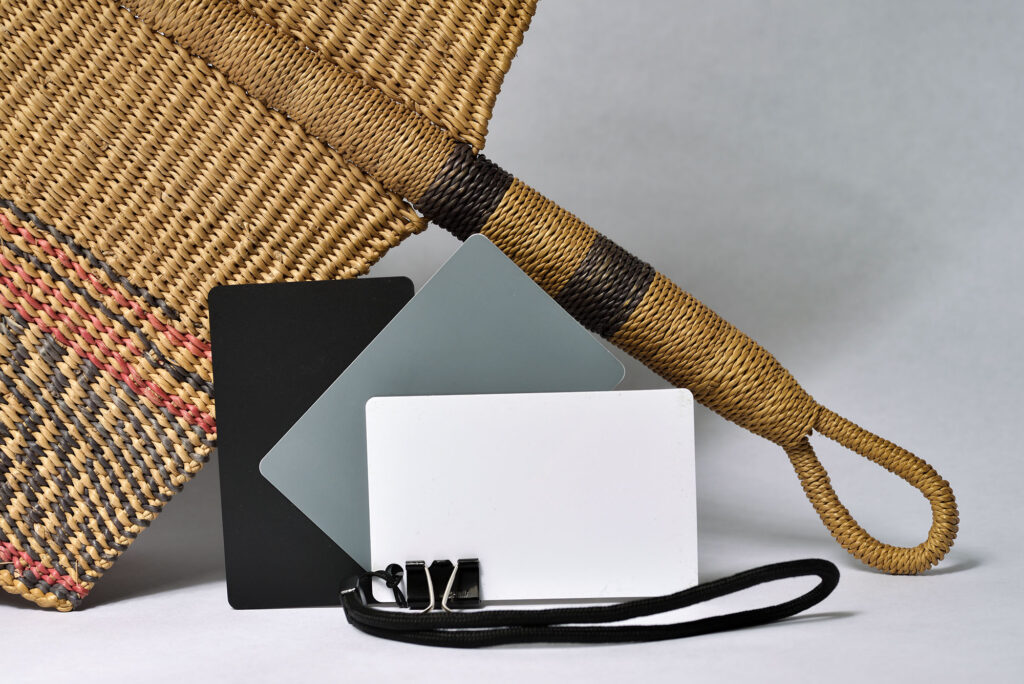
Here, I am referring to using them in a digital photo. By laying the cards out in the intended scene and photographing them in the same light as the subject, I can get a quick and easy starting point for adjusting white balance. There are a couple of options here.
Many digital cameras allow the photographer to set a custom white balance from a reference point in a photo. In this application I would photograph the cards and follow the camera’s instructions for setting a custom white balance. Saving that setting ensures that the following jpegs will be recorded at that custom level. This would be valuable in an indoor shoot lit by ambient light, or open shade under a blue sky. I can’t always trust my auto white balance.
Since I shoot in Raw, I still like to have a picture of the cards for reference in post-processing. I can simply put the white balance eyedropper in PS Camera Raw on the image of the card, and it adjusts the white balance to render it neutral. This is helpful when there is no other object of neutral color in the image.
For example, when shooting a bridal photo, I could take the white balance off the dress. Except, there are a lot of variations of what we loosely call white. I want the dress to be represented accurately, and it may not be exactly neutral. If I have a photo of the gray or white cards, I can go back and establish a proper white balance in post-processing.
Exposure
When shooting a DSLR or 35mm film, I typically don’t bother with the Zone System. That said, it is still in the back of my mind as I pay attention to the lightest and darkest areas of the scene. When shooting film, I can meter off the gray card as a starting point. I then assess the scene to decide if I need to work more in the shadow or highlight areas to preserve detail.
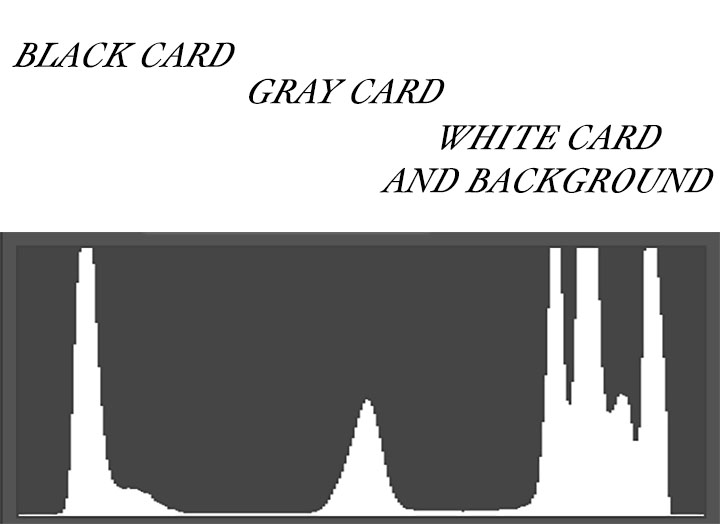
With the digital camera, I can photograph the set of cards in the same light as the subject and easily “see” the cards on the histogram as peak areas. I can adjust exposure to move those peaks in the histogram to the right or left, to ensure I am not losing detail in the shadows or highlights. The white card isn’t 100% reflective, and the black card isn’t 100% non-reflective, and so I make sure that their respective values on the histogram do not reach the extremes to the point of clipping.
Of course, sometimes I don’t want to use the “proper” white balance or a perfectly balanced exposure. At times I want to warm up the image or cool it down, depending on the mood I am trying to invoke. Likewise, sometimes I am shooting a high- or low-key image, and sometimes I want inky blacks or blown-out whites. These cards don’t tell me what to do; they just give me a reference point from which to to make informed decisions.