

During a period of frenetic photographic development and an obsession with megapixels, my rebellious soul dove down a different rabbit hole—a pinhole film camera. Call me crazy; you wouldn’t be the first.
Having researched the available options, I was immediately infatuated with a few models built out of fine hardwoods. Since I already had many cameras built of metal and plastic, a nice wooden camera seemed like it would round out the collection a bit. I could have 3d printed one, but to me that just lacks the warmth and elegance of fine wood. Makers like Ondu, Nopo, Noon and Zero Image create beautiful wooden pinhole cameras and seem to know their art. I settled on the Noon 612 model and my lovely wife placed the order for my Christmas present.
Noon pinhole cameras are made in Poland, by a craftsman named Jacek Urbanik. They have evolved a little in their design, but with a consistent commitment to quality workmanship. Upon unpacking it, I was initially surprised at its size. It was significantly larger than I anticipated, but after examining it further, I saw that no space was wasted. The size is by no means a negative issue—in fact, it shows the beautiful character and texture of the high-grade walnut. It is, after all, a 120 format camera, and nowhere near the size or weight of my Mamiya RB67. It fits perfectly inside my small Domke F-5XB camera bag and weighs less than any other camera I might typically put in it.

By now you have figured out that the exposure is made through a pinhole, rather than a lens. The “camera obscura” concept from which this developed dates back to the late 16th century, and was first used in photographic image-making in the early 19th century. Pinhole cameras have been constructed out of just about anything that can hold a piece of film and expose it to light through a tiny hole without allowing light to otherwise enter.
Mine is the 612 model, referring to its maximum 6cm x 12cm image dimensions. Inside, there are baffles that can be moved to make the film gate 6cm x 6cm, 6cm x 9cm, or 6cm x 12cm. There are frame number viewing windows on the back, with labels for the three formats laser-etched into the wood. Frame numbers on the 120 film backing paper are visible though these windows, ensuring proper alignment of the film. Two latches hold the film door closed, with interior geometry and a black matte finish preventing light leaks. Two knobs on top allow the film to be advanced (and tensioned if necessary). Also on top are small black raised buttons, that act like sights for framing each of the three image formats. On the bottom is a standard ¼” x 20 tripod bushing.
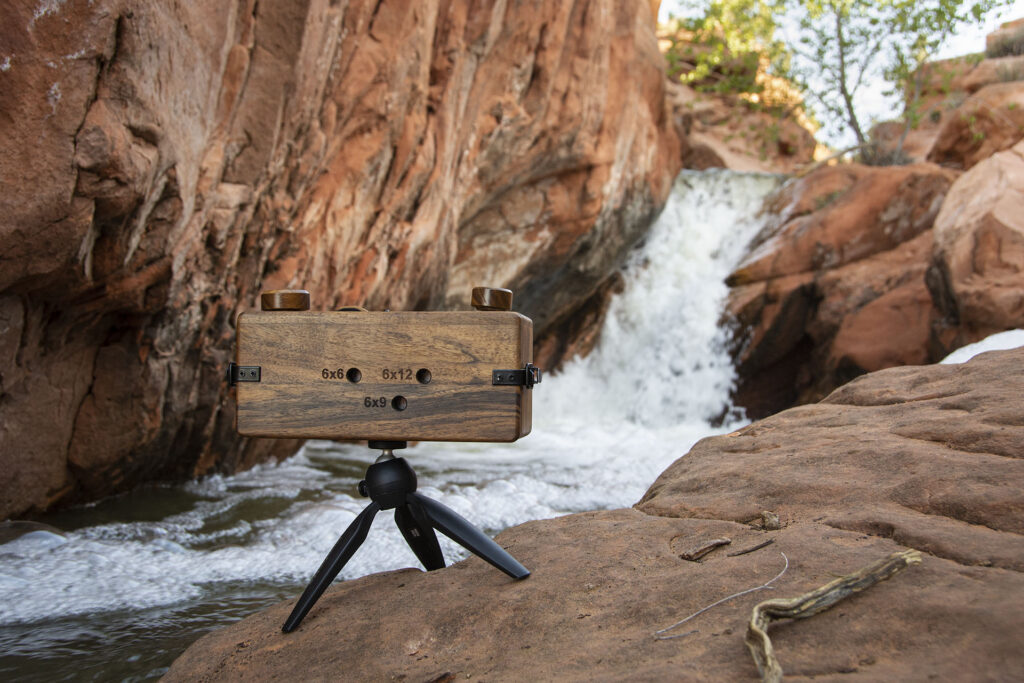
Since the top sights just give the user the approximate margins along the horizontal axis, I added brass studs on the side of the camera to show the top and bottom margins in the same way. This allows me to frame my image quite accurately. I use a small bubble level to indicate any unwanted tilt.
Noon cameras are shipped with an exposure card. This is necessary since most light meters do not show readings for the apertures one gets from a pinhole. The size of the pinhole varies with model, but mine is reported to be f231. The exposure card has two columns of exposure times: One for the metered exposure at f22, and the corresponding exposure time for f231. I believe these exposure times factor in the typical reciprocity failure of an average film stock. Some adjustment for a particular film may be necessary to optimize the exposure. So far, the card has been remarkably correct.
Exposures are made by simply pivoting the shutter cover upward to expose the pinhole, then sliding it back over the aperture when the prescribed time has elapsed. Even in bright daylight, metering 1/60 second at f22, the pinhole exposure time is 4 seconds. There is no need to be exact—as much as a second either way will make little difference, particularly with longer exposures. I developed the habit of keeping the aperture covered with my hand while sliding the “shutter” open and closed. This allows me to still get the correct time even if I fumble the shutter a bit, and prevents any motion blur occurring as a result.
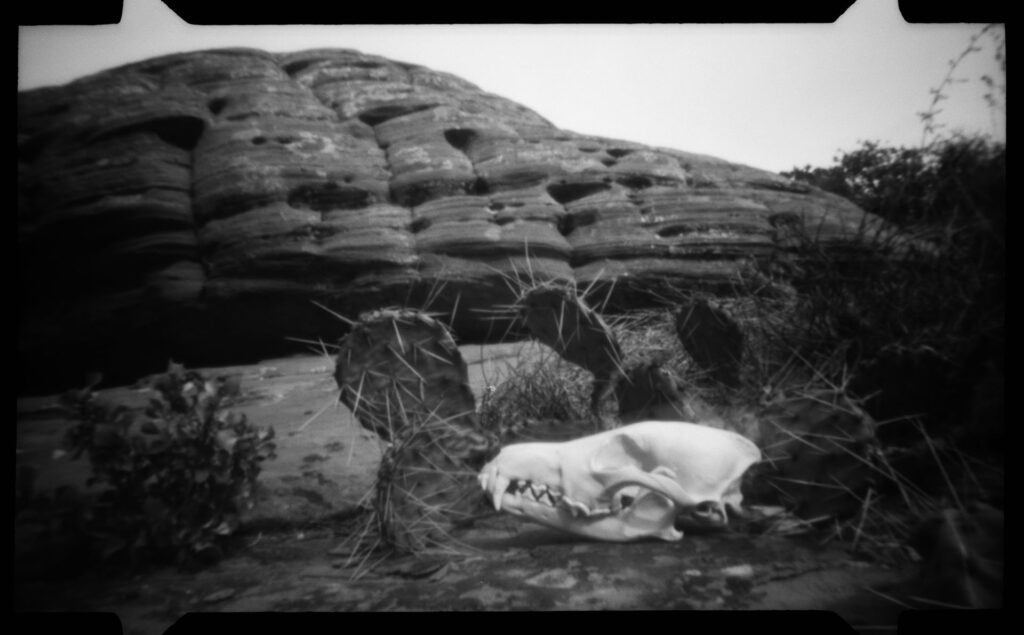
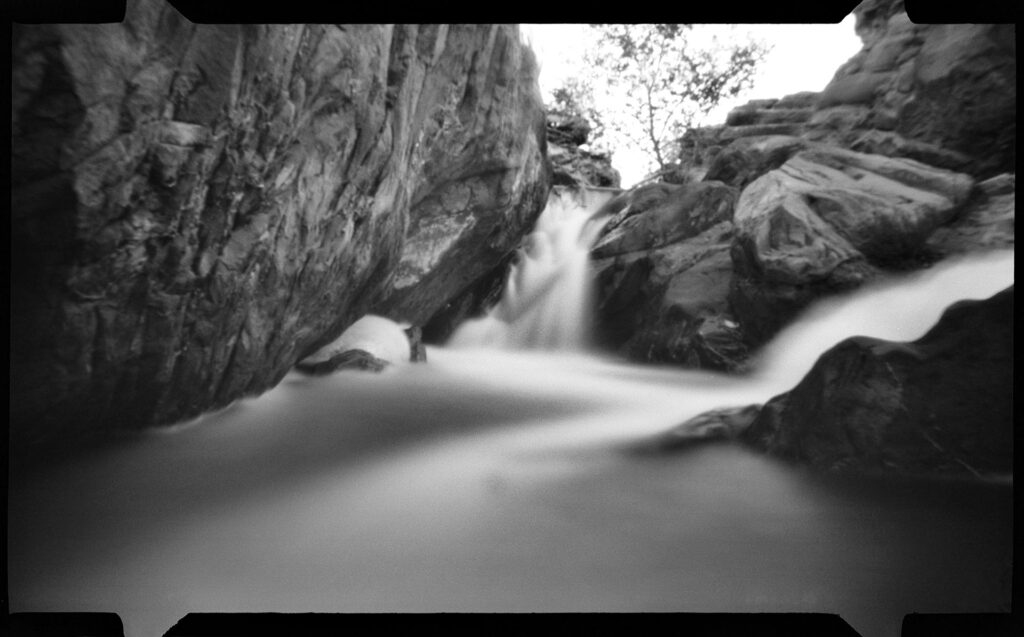
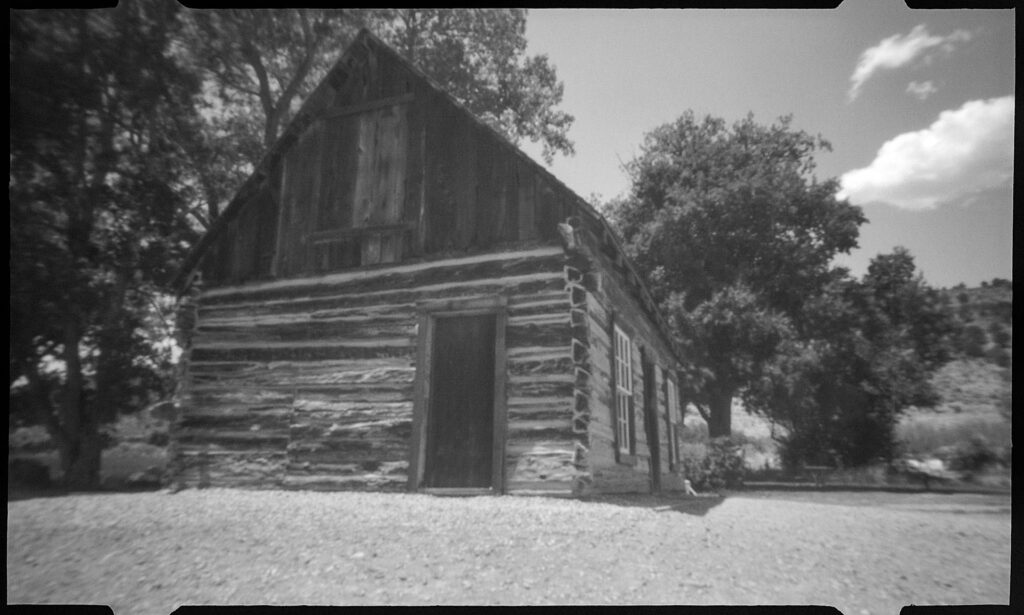
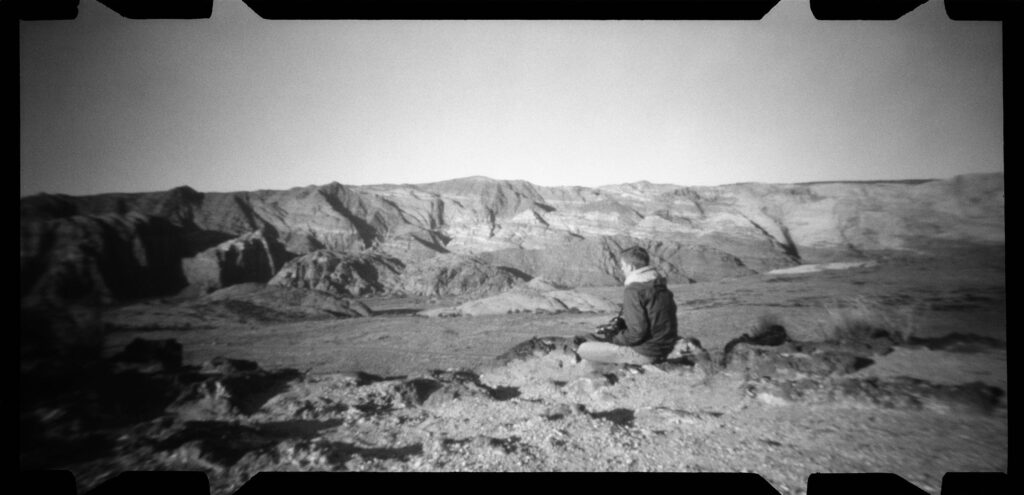
Yes, I’ll admit that worrying about motion blur may be silly. Images from pinhole cameras are not known for their sharpness. There are no multi-coated, aspherical, low-dispersion, vibration reducing pinhole cameras out there. There are, however, formulas for optimizing the pinhole size relative to the format and distance from the film plane. Also, modern pinholes are cut with lasers to exacting degrees of roundness and measured microscopically for size. Still, obsessive pixel-peepers will require sedation. Pinhole cameras are not for them. The images are not sharp. They are, however, dreamlike, soft, and have an unmistakeable character. Vignetting is common, as is distortion near the margins. These are all part of the charm of the camera obscura. I suspect a certain percentage of new pinhole camera owners are disappointed in the lack of sharpness, and many slightly used pinhole cameras are on the market as a result. Be ready to embrace the inherent nature of the images, or go buy something with a lens.
You might ask yourself “why do it at all?”. My response is a resolute, “I don’t know.” The cost per frame, time required, image quality, and sheer effort to make a photograph all seem to dissuade reasonable, practical people from going down the pinhole path. I can say, though, that the act of making photographs in the deliberate absence of any modern mechanical technology has been rewarding by itself.
