
Few names are as synonymous with photography as Rolleiflex. Around that brand is an aura of quality, exquisite engineering, optical excellence, and professional performance. Does it deserve it? In many ways, I suppose it does. Legendary photographers such as Doisneau, Maier, Capa, Bischoff, Cunningham, Beaton and Avedon used them to create timeless images that still grace the walls of elite galleries. Those images span multiple genres including fashion, reportage, street, landscape and more.
My grandfather was an avid amateur photographer and military attache in Viet Nam in the early 1950s. His Vietnamese counterpart and his interpreter were also photographers. They had Rolleiflexes, and my grandfather had a Leica. He repeatedly mentioned his admiration for the Rollei and lamented that he was never able to afford one on a young officer’s salary. Nonetheless, from early on I was conditioned to salivate at the mere mention of the name.
Fast-forward a few decades, and now I own one. I have been waiting to write this post, hoping to do the camera justice. Can I say anything that hasn’t already been said? Probably not. All I can really do is describe my own experiences with one, and offer my humble assessment of the machine. I will try to be as objective as I can.
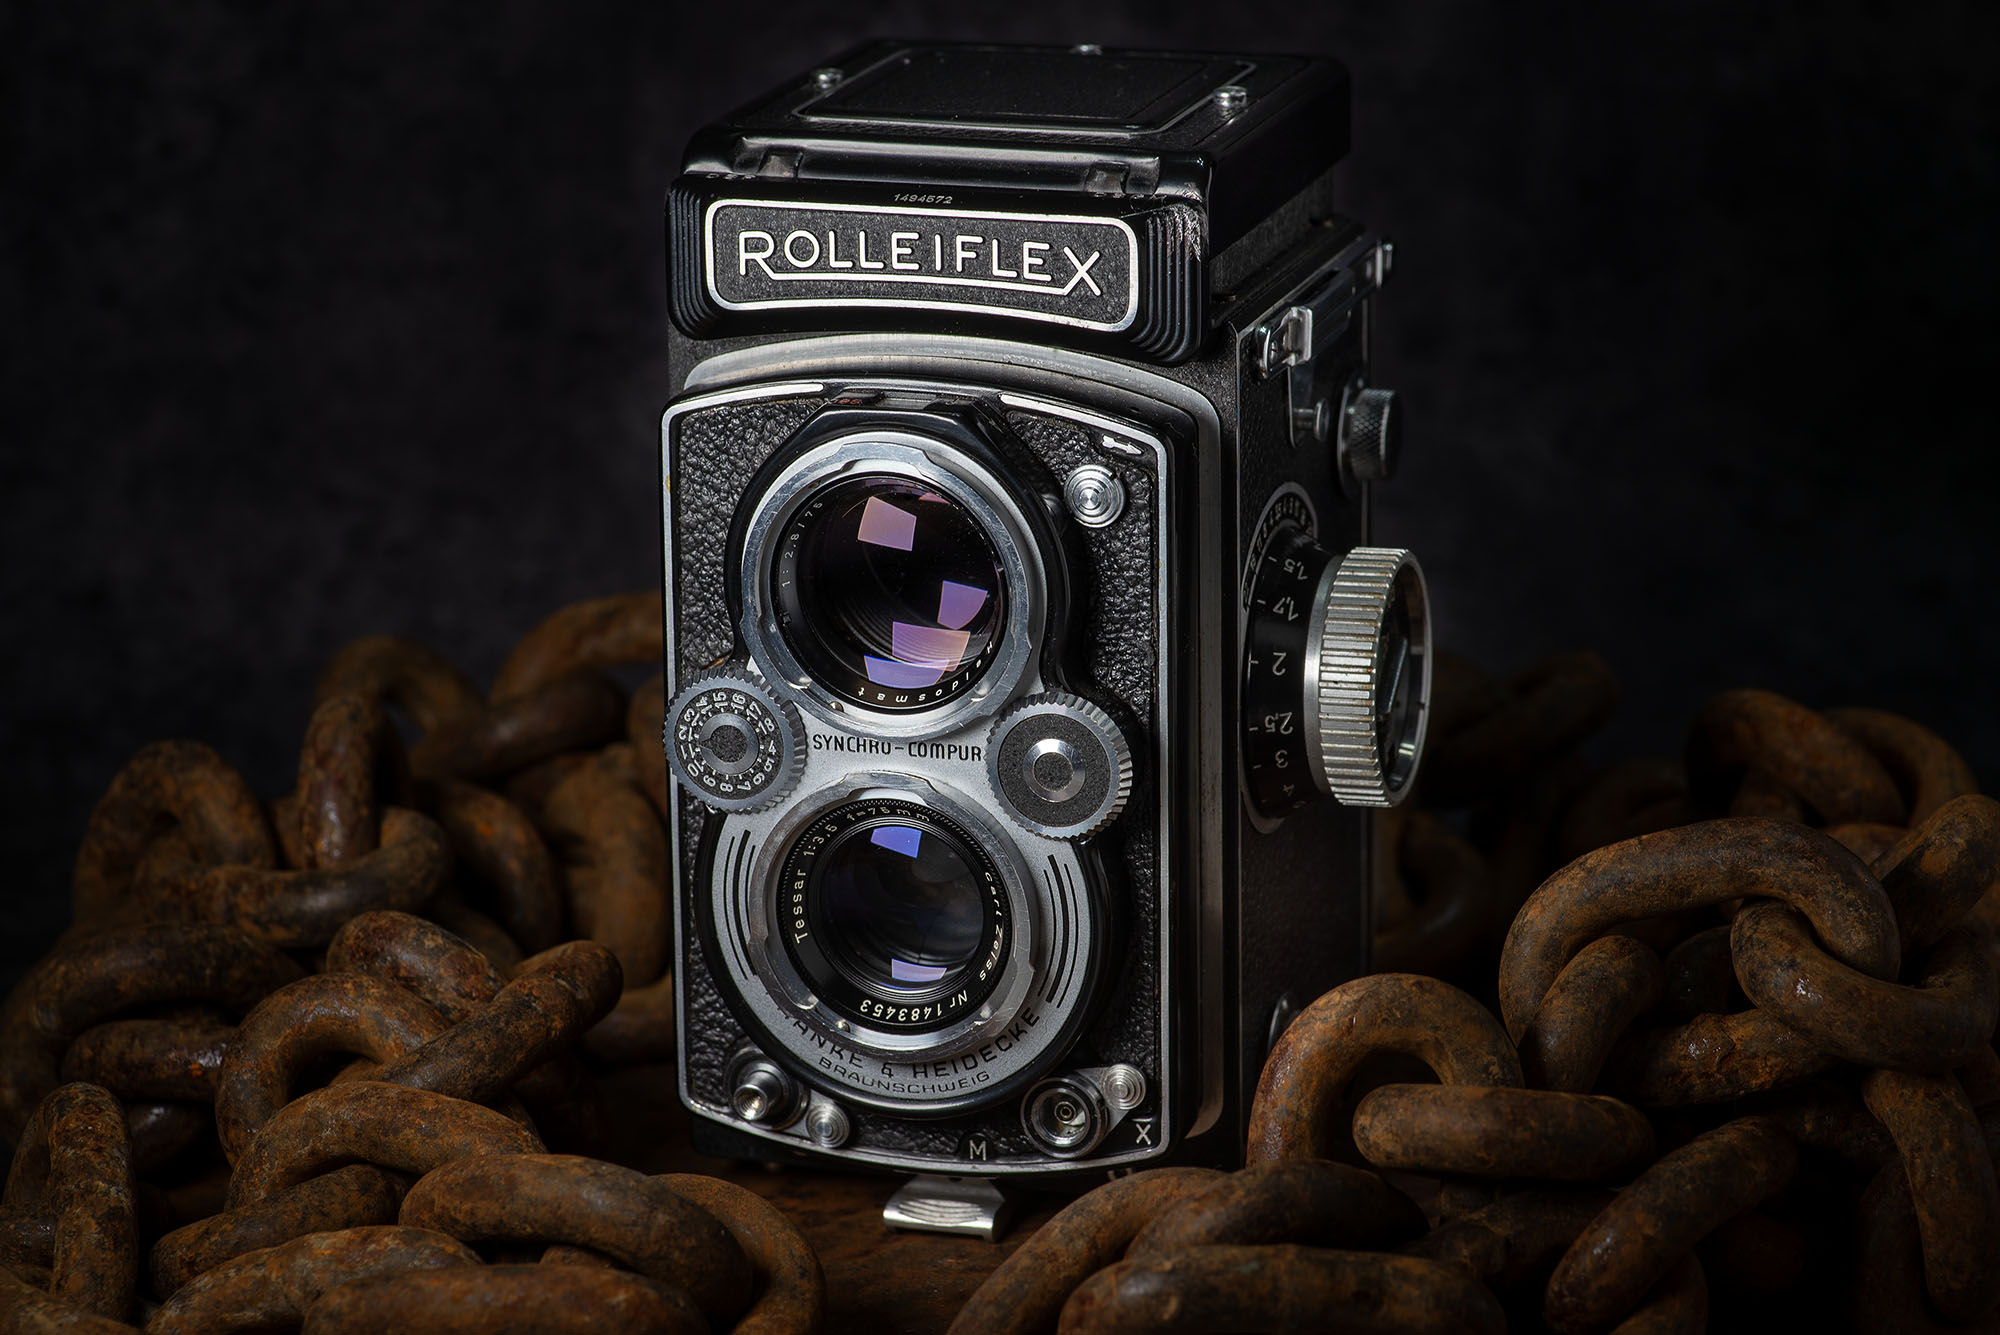
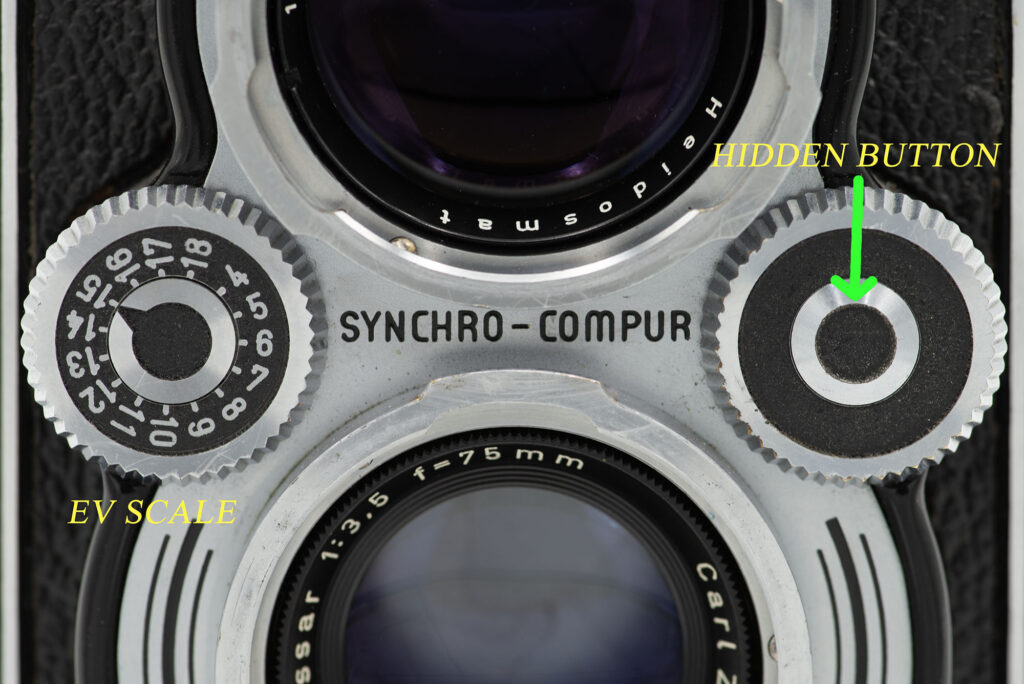
This is the MX-EVS, a mid-range model aimed at perhaps the advanced amateur or pro on a budget. “MX” refers to its ability to synchronize the shutter with either flashbulbs (M) or electronic flash (X) . “EVS” refers to the “Exposure Value” system, in which numeric values are assigned to metered luminance levels. More about that later.
Being a TLR, or Twin Lens Reflex camera, the two lenses have different functions. The top lens is the “viewing” lens, through which the photographer sees and composes the image. The bottom lens is the “taking” lens through which the image is actually exposed. The bottom lens is a 75mm f3.5 Carl Zeiss Tessar, which isn’t particularly fast by today’s standards, but still quite capable. Other models had other lens configurations.
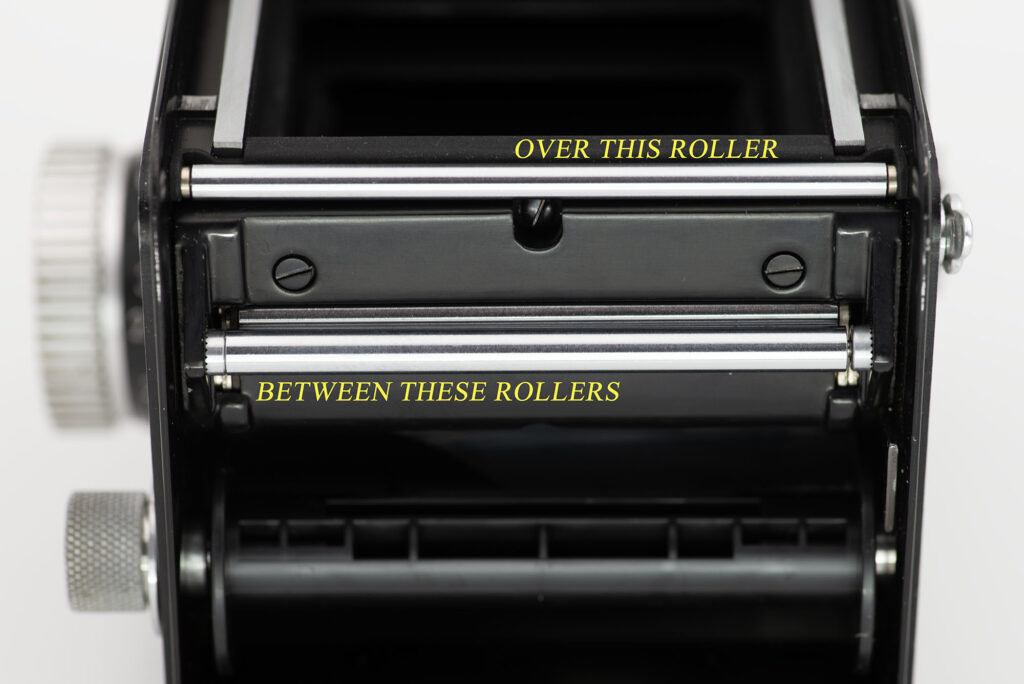
This camera was built between 1954 and 1956, and, depending on the source, is known as the MX-EVS, MX-EVS Type 1, or Rolleiflex 3.5 B. It was the last of the “Automat” group of models, referring to the automatic film indexing system. When loading the film, the leader goes between the first set of rollers and over the rest. Upon tensioning and winding the leader, the camera’s film advance system senses the increase in thickness or rigidity and stops at the first frame automatically. This was an improvement over other methods, such as lining up an arrow with an indexing mark, or viewing the numbers on the backing paper through a red window.
Many models and variations were made over the course of several decades. There is plenty of information about the history and chronology of the models out there, and I won’t go into that. Suffice it to say that this is neither the top model nor the bottom, and they are priced accordingly.
Most Rolleis of this vintage require some service, most likely in the shutter, but also in the film advance gears and the focus mechanism. The shutter is a Synchro Compur leaf shutter. Although a mechanical marvel, it is also susceptible to aging lubricants slowing down the moving parts. I had mine serviced due to a sluggish shutter shortly after purchase, and it now works like new.
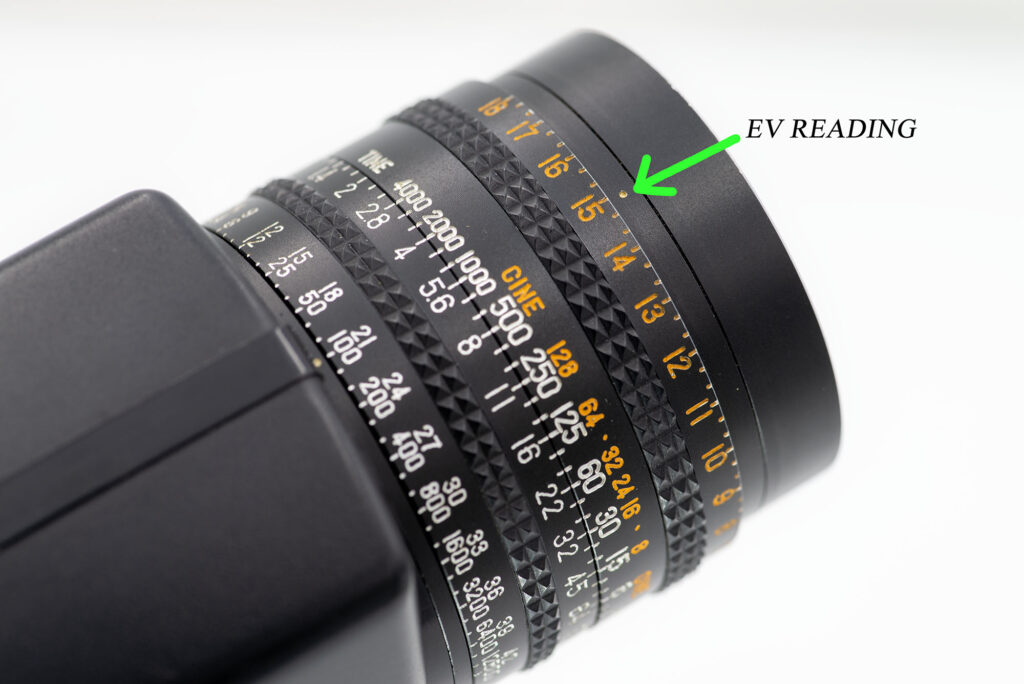
Many vintage light meters read in “EV”, or exposure value numbers. These numbers corresponded to a set of shutter speed/aperture combinations that provided the appropriate exposure for the particular film speed (ASA, DIN or ISO). For example, a spot meter reading off a gray card of EV 15, at ASA 100 gives an exposure of 1/125 at f16, 1/250 at f11, 1/500 at f8 and so on.
The two dials between the lenses control the shutter speed and aperture. They are locked together, but are unlocked by pressing the middle of the right dial. The numbered dial on the left (facing camera) shows the EV numbers. The exposure is set by pressing the middle of the right dial and turning either dial until the tiny arrow points to the metered EV number. Releasing the button in the right dial locks in the exposure, and turning either dial will give you different shutter speed/aperture combinations. It sounds more complicated than it is. The alternative, of course, is to meter and set the exposure conventionally. The exposure settings are visible from above, in a window over the viewing lens.
Looking down through the waist-level finder is pure joy for the uninitiated and veteran alike. The image magically appears on the ground glass, although reversed, without batteries or electronics of any kind. A pop-up magnifier serves as a focusing aid. Getting oriented with a reversed image can be a little awkward at first, but becomes familiar over time.
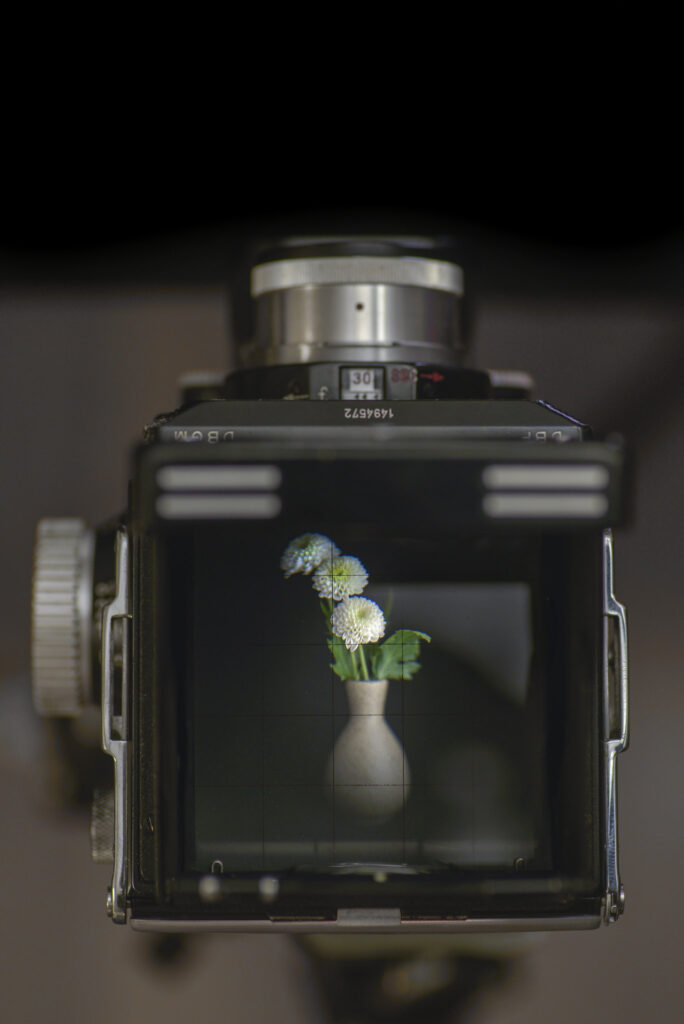
I believe there is an unintentional benefit to the reversed image. I find it helps me to analyze the image and identify both distractions and compositional elements better, since it is not as I naturally see the scene. Also, the act of looking down rather than straight ahead seems to have the effect of isolating the image before taking the photo, again allowing me to analyze it better.
TLRs of this style generally shoot a square image, in this case a 6cm x 6cm image on 120 film. When 35mm film overtook mainstream photography, the square image took the back seat. Portrait photographers I knew that shot Hasselblads in the studio still cropped the square images to fit the rectangular print sizes such as 8×10, 11×14 16×20 and such. The square format seemed relegated to vinyl record jackets and a few fine art photographers. Instagram is largely responsible for bringing the square photo back into the public’s consciousness in the digital age.
As there is no long axis to a square image, composing the photo is an exercise in seeing differently. There is no “portrait” or “landscape” orientation. I have to flip a mental switch to get into my square headspace, and use compositional elements differently. This, at least for me, becomes part of the fun of using a TLR, or any camera that shoots square images.
Combining this factor with the thrill of using a fine German camera results in a unique photographic experience. There is a certain satisfaction that occurs with manipulating precision controls and feeling the smooth mechanical action. The shutter is nearly silent, the focus is smooth, and the film transport is unique to this type of camera. I enjoy every moment behind it.
Using a Rolleiflex brings me joy, but with a certain amount of frustration at times. At the possible risk of staining this love letter, I offer up a few drawbacks, in no particular order. Since the viewing lens has no aperture, there is no way of pre-visualizing the depth of field. There is a DOF scale on the focus knob, but that’s not nearly as convenient as the simple DOF preview button available on many SLRs.
When mounted to a tripod, changing the film is best done by dismounting the camera first. This allows access to the lever that opens the back. This is inconvenient when shooting volumes of film in the studio. There is a quick-release accessory called a Rolleifix that alleviates this to some degree. Also, when shooting in the studio with subdued lighting, I find the focusing screen to be darker than I would like. There are aftermarket bright screens that improve this, but I haven’t invested in one yet.
Other than the initially sluggish shutter, the only failures I have had were my fault. The film pressure plate has two settings. One position is marked 35mm, and is for use with an accessory called a Rolleikin. This allows the use of 35mm film in the camera. The other is the standard 120 film setting. Somehow I had inadvertently bumped the pressure plate to a position between the two settings, which resulted in the film not being held flat during a shoot. Every image was blurry, and I was crushed. Fortunately I had also shot on 35mm as well as digital, and managed to get some good images.
Rollei made a dizzying array of accessories for their TLRs. Among my favorite is the Rolleinar, which is a set of lens attachments that allow for closer focus. Three variations were made, with different minimum focus distances. It consists of a top and bottom lens, with the top containing a prism that a corrects for parallax at close distance. I have the Rolleinar III, which offers the closest focus. This was a miracle find in a thrift shop. I would like to also find the Rolleinar I and II, as they are better suited to portraiture. The Rolleinar III is great for still-life and product photography. They are brilliant.

If shopping for any lens-mounted accessories such as filters, hoods, or Rolleinars, make sure you have the right lens mount. Rollei made different bayonet mounts for different cameras, and are designated Bay I, Bay II, Bay III and so on. The MX-EVS has a Bay I lens mount.
This camera came with a yellow filter and lens hood, something I recommend to anyone pursuing this type of camera. These mount to the bayonet ring around the taking lens. Older lens coatings are not as efficient at reducing lens flare, and stray light from the sides can reduce saturation and contrast. A lens hood helps block this stray light. The yellow filter is useful when shooting black and white film to increase contrast and darken blue skies. Other colored filters are available that offer different tonal shifts when shooting black and white film.
Is the Rollei the best camera ever made, for every type of photography? Of course not, but I can’t discount the fact that many of the great 20th century photographers favored it. Following in the footsteps of those masters holds a certain nostalgic romance. I remember an old saying, “If it moves, shoot it with a Leica. If it doesn’t, shoot it with a Rollei.” Sometimes I will see a scene that begs to be shot square, and I will return with the Rolleiflex for that purpose. Some scenes I have watched for months, waiting for just the right light or conditions to call upon the Rollei to perform.
I have prattled on long enough, but I wanted to cover what I considered salient. My experience thus far with the Rolleiflex has been stellar. A move from a 35mm SLR to a 6x6cm TLR will change your photography. It will force you to slow down, carefully compose, meter and deliberately make each photograph. I believe the net effect of this is an improvement in the overall quality of one’s photography.
Specs:
Designation: Rolleiflex MX-EVS 120 Rollfilm Camera
Production: 1954-56, Germany
Format: 120 film, 6×6 cm image
Shutter: Synchro-Compur Leaf Shutter
Shutter Speed Range: 1 second to 1/500 plus Bulb
Lens: Carl Zeiss Tessar, 75mm f3.5
Aperture: 5 blades, curved
Aperture Range: f3.5-f22
Minimum Focus Distance 0.9m (3ft)
Viewfinder: Waist-Level, Ground Glass With Grid
Flash Sync: M (flash bulb) and X (electronic)
Sync Speed: All Shutter Speeds on X
Hot Shoe: No. PC Cord Socket Only
Self-Timer: Yes
Other Features:
Magnifying focus aids (waist-level and eye-level, direct or “sports” finder, film type reminder, DOF scale, exposure calculator graph, shutter button lock